115 Savannah Rd., Lewes, DE 19958
(302) 645-1922 Phone
Email: kathy@cleancutpavers.com
©2013,Clean Cut Interlocking Pavers & Custom Inground Fiberglass Swimming Pools, All Rights Reserved.
Why Choose Pavers?
BE AN INFORMED CUSTOMER! PLEASE READ THIS BEFORE CHOOSING A CONTRACTOR:
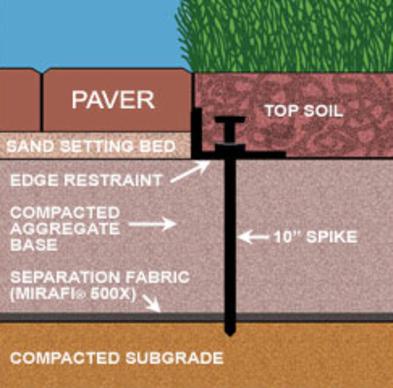
The most important part of a paver project is the part you can't see ~ a properly installed base. This is where some companies cut corners so they can offer a lower price. These are the projects we get called on to fix a year or two down the road when the pavers are sinking. The old saying, "you get what you pay for" is very true when it comes to pavers. The importance of a firm base cannot be overstated - the integrity and longevity of your pavers depends upon the quality of the base!
The Interlocking Concrete Pavement Institute (ICPI) has issued the following guidelines for proper paver installation. Be sure any quotes you receive specifically state that these steps will be followed so you can be sure you are investing your money wisely.
As with any building project, the finished pavement will only be as good as the construction of the base:
1.) Before a firm base can be installed, existing material must be excavated and hauled away. Then the remaining subgrade must be compacted with a plate tamper.
2.) Geotextile Separation Fabric is then laid. This separates and contains the base from the underlying sub-base. Without Geotextile, the soil would eventually work it's way into the base and weaken it. We use Geotextile on EVERY one of our paver projects, therefore extending the life of
your Paver Investment.
3.) A minimum of 4" of Compacted Aggregate Base is used for
patios & walkways or 9" for residential driveways. This base
material is then spread evenly in 2" layers. A plate tamper is
used between layers until the final thickness is achieved. When
finished, the base should be very smooth & flat, and reflect the
final grade of your pavers.
4.) Edge Restraint is then installed along exposed edges and
secured into the base with 10" spikes. This restrains the pavers
laterally, which prevents shifting.
5.) The Sand Setting Bed, or leveling course is then screeded.
This 1" thick layer of coarse concrete sand allows the pavers to
"seat" properly.
6.) Now it's time to lay the pavers! We pay close attention to
every detail, for example:
*Using an even mix of pavers, so colors are nicely blended
*Mitered corners
*Keeping the jobsite clean
7.) Once the pavers are laid and swept, a tamper is used to "seat" them into the bedding sand, forcing sand from below into the joints.
8.) The final step is to spread joint sand over the pavers. This requires several rounds of filling, sweeping and tamping. This forces the sand into the joints, thereby creating the "interlock". We ALWAYS use Polymeric Sand, which hardens after being sprayed with water. Polymeric Sand resists erosion from water, frost, wind, street sweepers, etc., it inhibits weed growth, resists ants & other insects, and it is available in your choice of Tan or Grey.
To prevent future drainage issues, we use laser transits to establish the proper grade & fall. The proper grade & fall must be achieved so water drains away from your house and no puddles occur on your pavers. This is just one of the extra steps we take to ensure customer satisfaction!
Clean Cut's Guarantee
While under warranty, Clean Cut will repair or replace any defect in our workmanship without charge to the customer. We guarantee your residential paver installation against any defect in our workmanship for 3 years.
Richard H. Bell III - President
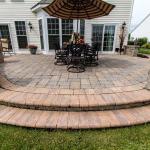
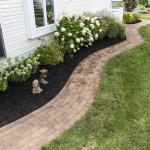
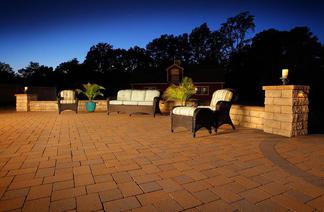
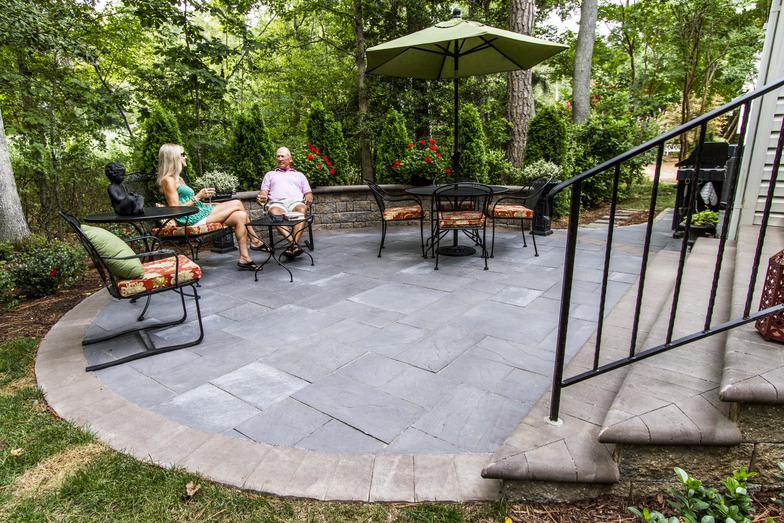
One of the many reasons to choose interlocking concrete pavers for your project is the fact that there are SO many choices, such as texture, color, shape & pattern. These choices will enable you to truly customize your outdoor living space and make your project stand out from the neighbor's. Pavers can drastically improve the appearance of your home and increase the overall value of your property. Check out our "Before & After" page to see what a difference pavers can make!
Interlocking Concrete Pavers create a beautiful and durable pavement surface, which should last the life of your home when installed correctly. One of the biggest advantages of using pavers is that they will not crack or buckle, like concrete & blacktop. The joints between the pavers allow them to move slightly, which prevents damage during the freeze/thaw process.
Pavers are also environmentally friendly! Rainwater washes down through the joints, returning it back into the environment, which reduces run-off contaminants. In fact, several of the towns along the coast now require the use of Eco-pavers instead of concrete or blacktop.
* * * * * * * * * * * * * * * * * * * * * * * * * * * * * * * * * * * * * * * * * * * * * * * *
* * * * * * * * * * * * * * * * * * * * * * * * * * * * * * * * * * * * *
We always recommend using Nicolock pavers because we feel that they make the highest quality products. They offer a limited lifetime warranty on the structural integrity of their manufactured product and the warranty is transferable to the next owner should you sell. Please click on their logo to see all of the products they offer or pick up a catalog at our office.
Of course, if you prefer another manufacturer's product, we can certainly install whatever you would like - just let us know when you meet with our estimator.
* * * * * * * * * * * * * * * * * * * * * * * * * * * * * * * * * * * * *
THE IMPORTANCE OF A PROPERLY INSTALLED BASE


